The day before an install is always the same: works leaning against the wall, a tape measure, and the question of what goes where. At my first larger hanging I decided it in the room, drill in hand, and drilled three holes too many. Since then I build the hanging plan beforehand, as a floor plan on screen. You put up the walls, hang your works virtually, and see at once whether the big piece fits the short wall or not. Here is the path, step by step.
Why plan it beforehand at all?
Because in an empty room every wall looks the same at first and you underestimate the gaps. On the floor plan you see the real measurements: that there are only 2.40 meters between the door and the corner, that the large canvas needs the whole end wall, that two small works read better together than scattered. And you see it before the first hole is in the wall. The plan is also your checklist for install day and, if you work with a gallery or an art space, something you can send ahead.
For this to work, your works should already be in Opus. How to keep an artwork inventory I’ve described elsewhere, and if you still have a spreadsheet, you can import it in a few minutes. Then you pick straight from your own catalog while planning instead of typing titles.
Step 1: Create a floor plan
In your workspace, open the floor plans area and create a new one. Opus asks what it’s for first: Exhibition for free placement on walls and pedestals, Storage for the grid that locks works into place. For exhibition planning you choose Exhibition, give the plan a name, and land in the editor.

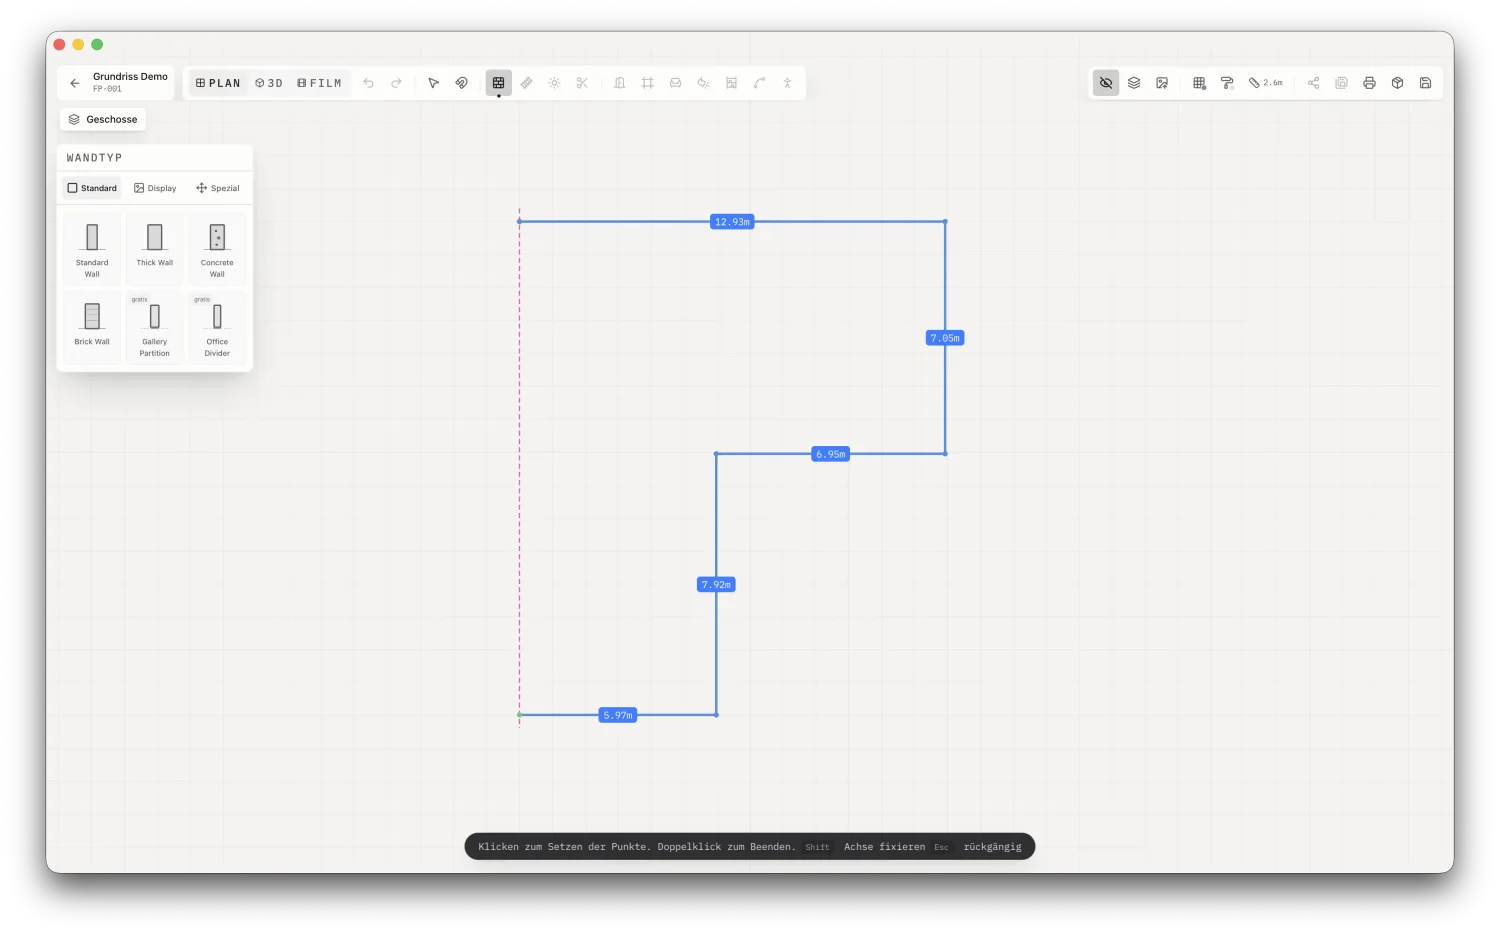
Step 2: Draw the walls
If you have the real floor plan as an image or PDF, load it in with upload floor plan. Opus then asks you to calibrate the scale: you click two points whose real distance you know, like a door width, and type in the value. From then on every measurement in the plan is right.
If you don’t have a plan, you draw the room yourself. Take the Draw Walls tool, click the corners one after another, and close the room with a double-click. Hold Shift when a wall should run exactly horizontal or vertical. It doesn’t have to be millimeter-perfect, but the proportions should be right, or the hanging won’t add up later.
Step 3: Hang the works on the wall
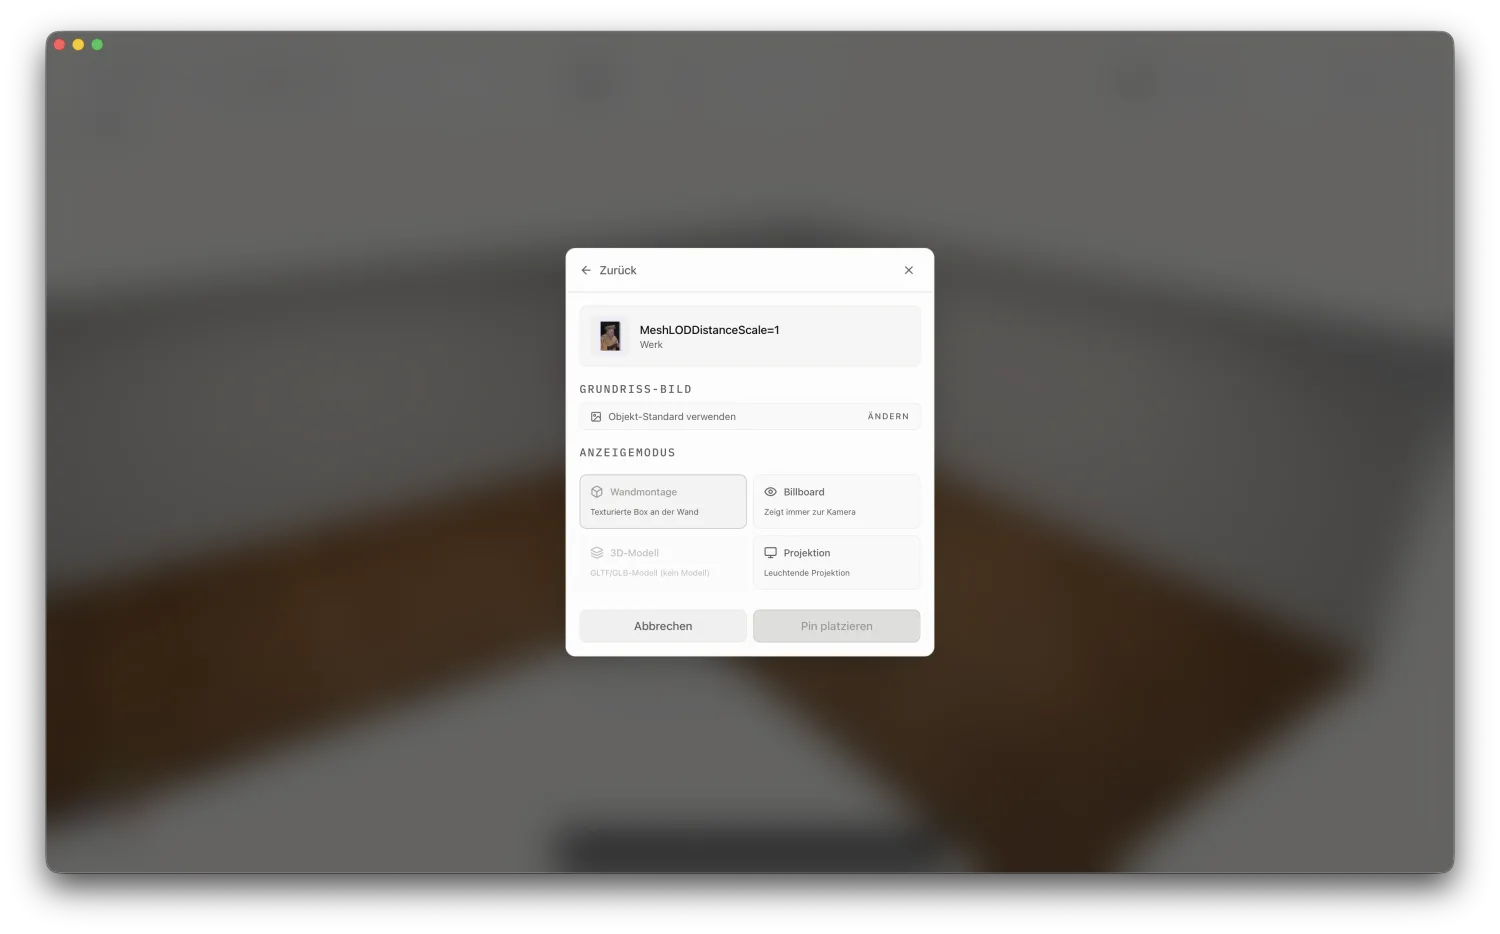
Now the actual part. Take the Place Artwork tool and click the wall the work should go on. Opus opens the picker with your catalog, split into artworks, projects, and inventory. Find the piece, confirm, and it hangs at the spot you clicked. You repeat that for each work.
Because Opus knows the real dimensions of your works, you see the proportion at once: a small format next to a two-meter-wide painting, and whether there’s enough air between them.
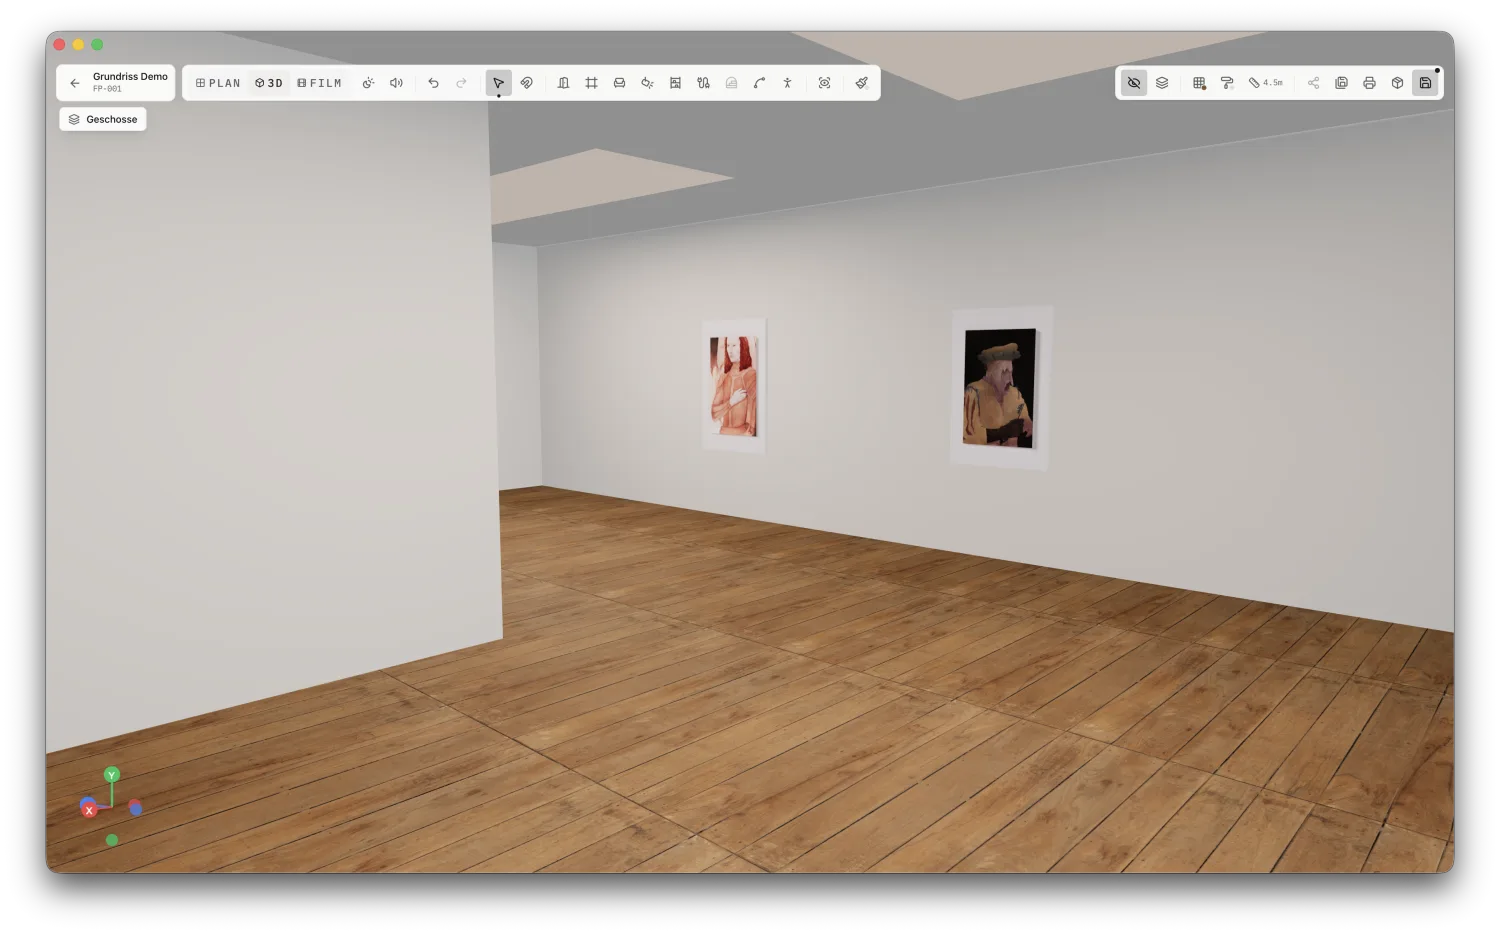
Step 4: Check in 3D whether it holds
Switch from Plan to 3D at the top. Instead of looking down from above, you now see the room at eye level, the way visitors will. This is where you catch what the floor plan hides: that the tall piece hangs too low, that two works crowd each other at the corner, that a wall reads empty.
Per work you can adjust the hanging height, the rotation, and the frame, and with the Gallery lighting mood you see the room in neutral exhibition light rather than work light. Move things until it sits. That costs you a few clicks here and no drill holes on install day.
Step 5: Print the hanging plan
Once the hanging is set, you export it as a PDF. The exhibition plan shows the floor plan with every work, its title and dimensions, exactly what you need in hand on install day. Take it printed, so you’re not stuck at a screen, or send it ahead to everyone helping with the build.
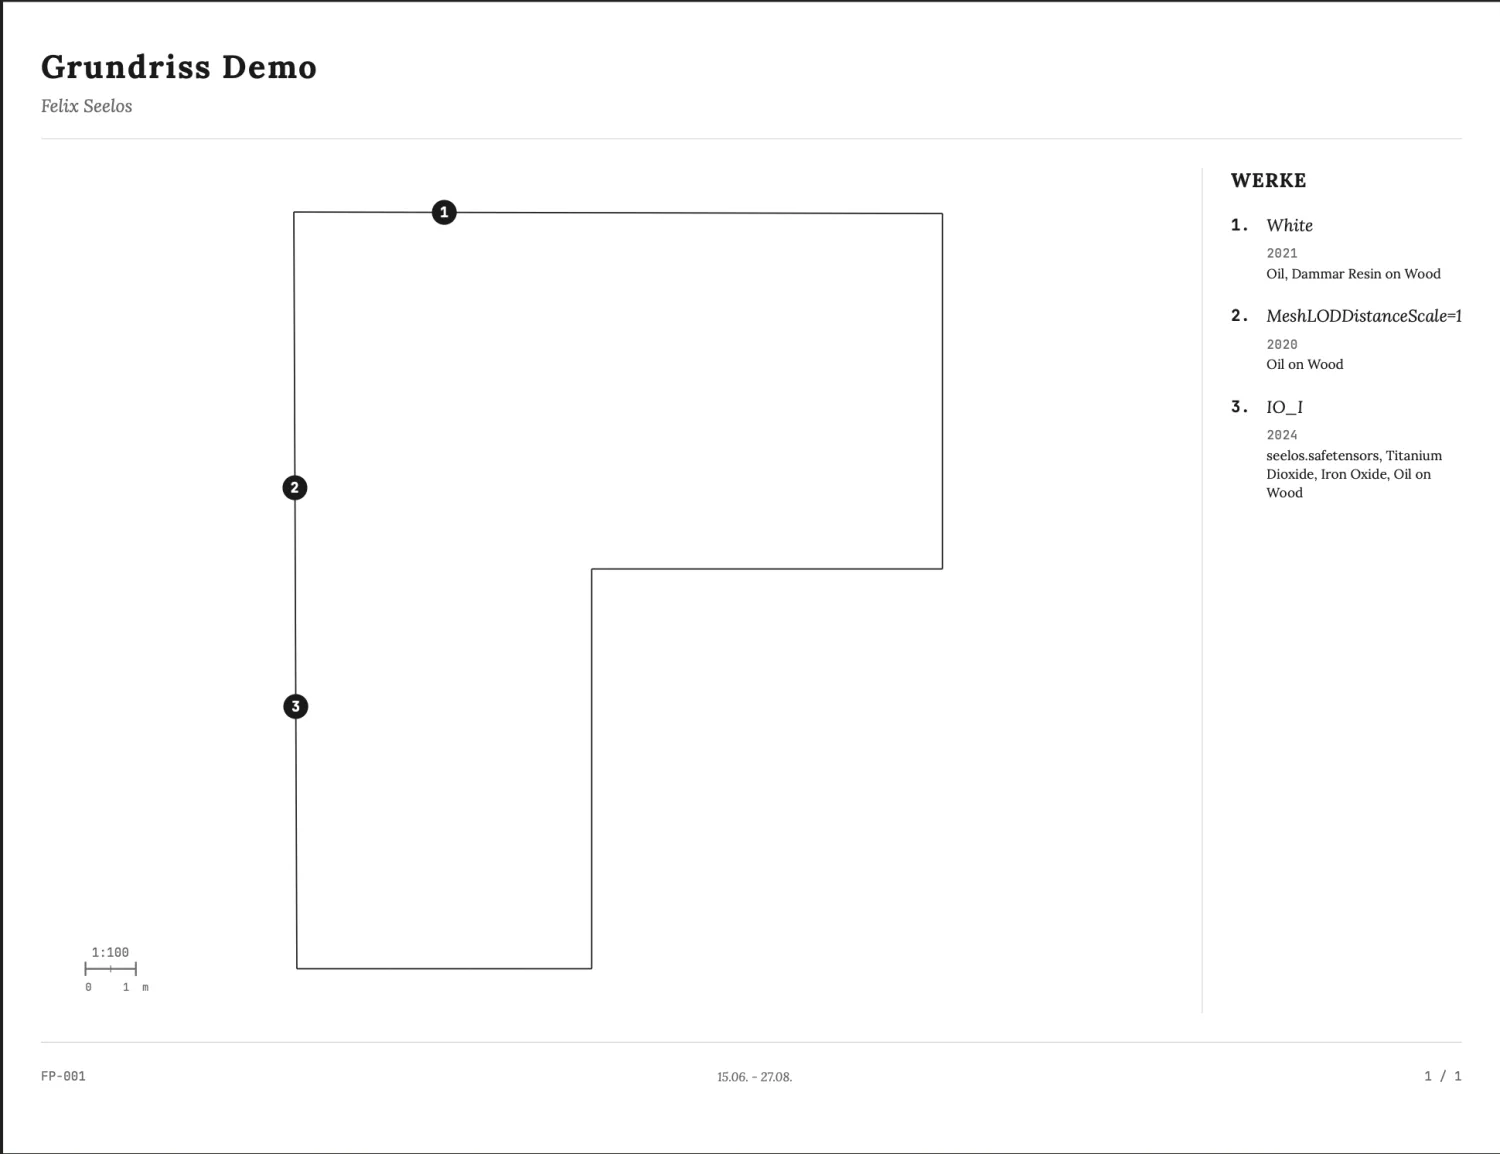
Open the plan to visitors
The same printout keeps working once the show is up. You know every piece, title, year, medium, price. The person standing in front of it knows none of that, sees a small wall label off to the side, and afterwards has a browser tab with your name at best. You can close that gap in the same step.
When printing, you switch on the QR code option in the exhibition template. Opus then creates a public link to your floor plan and prints the code with the label “View in 3D” on the plan. Whoever scans it at the entrance walks the same room on their phone, in 3D, and taps a work to see its title, year, and details right there. On a phone the view turns with the movement of the device, so they look around rather than swipe.
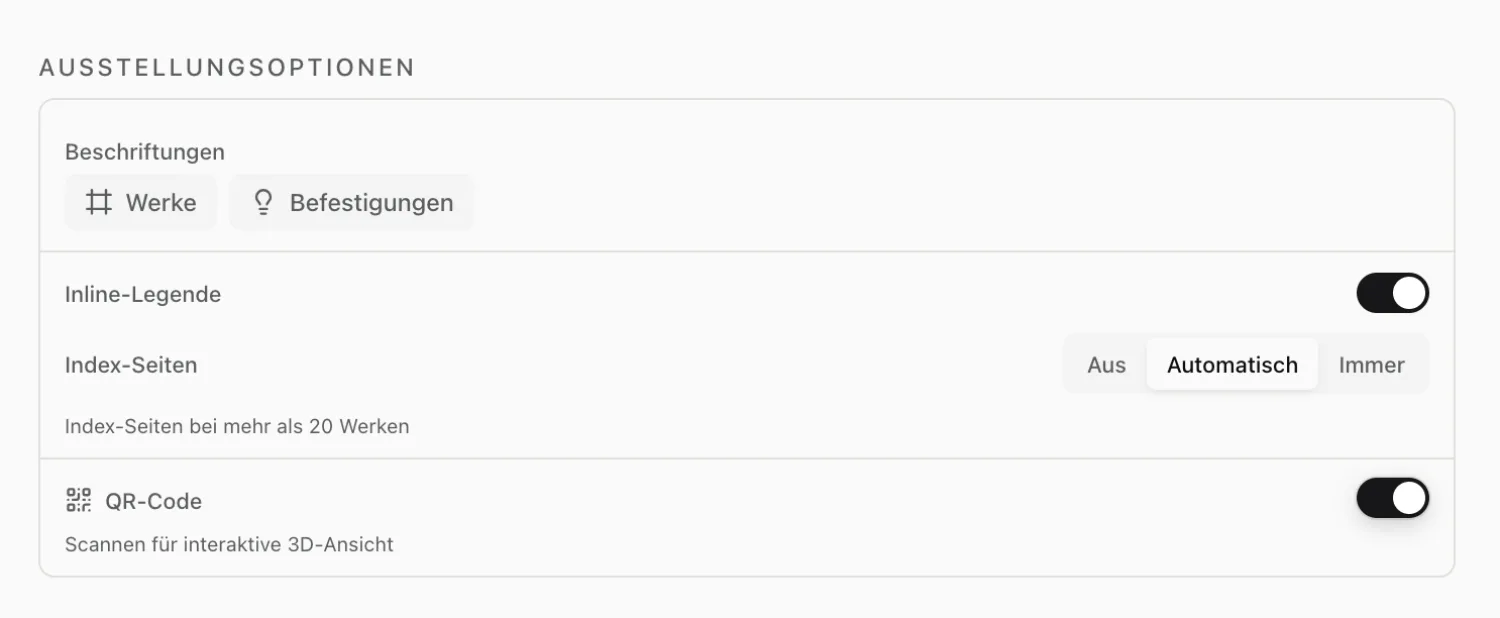
It costs you no extra work, the code is created as you print. For visitors it’s the difference between standing puzzled in front of a piece and knowing at once what they’re looking at. The QR code works in the cloud version and the exhibition template, and the link is public, so only what you actually want to show.
When something snags
A few things that come up in practice:
- The work isn’t in your catalog yet. You can only place what exists in Opus. Add the piece first or import your list, and it shows up in the picker.
- No floor plan as a file. Trace the room roughly, but stick to the real wall lengths. The absolute measurements matter, not the clean line.
- Several rooms. Draw them in the same plan as connected walls. You plan the whole exhibition in one floor plan, not one per room.
- Two of you at once. While someone is editing a plan, it’s read-only for the others so nothing gets overwritten. Wait until editing is free, or agree on who’s on it.
- No QR code in the print settings. The option lives in the cloud version and the exhibition template. Pick a different template or work locally and it isn’t there.
One plan, two jobs: it walks you through the install, and with the QR code it accompanies visitors afterwards. This is what exhibition planning in Opus is built for — try it with your own room and plan the next hanging on screen, before the first nail is in the wall.