If you already keep your artwork inventory in a spreadsheet, moving to Opus is not a fresh start. You upload your table, map the columns once, and the rest happens on its own. For my two dozen or so works it took a few minutes, and at the end every piece had its work number, its medium, and its status in one place. Here is the path, step by step.
If you’d rather read along first and do it after: here is the sample table I use to show the steps. Download it, import it into a test workspace, and you’ll see exactly what happens.
Before you start
Your table needs only two things for a clean import. First, a header row, meaning a first row with column names like Title, Year, Medium. Second, one row per work, with no blank rows or merged cells in between.
Which columns make sense, I covered in how to keep an artwork inventory. And if you’re still weighing whether to leave the spreadsheet at all, that’s in your artwork inventory spreadsheet: where it breaks. Opus reads both .xlsx and .csv, so there’s nothing to convert. You don’t need the photos at this stage, they come later.
Step 1: Open the import assistant
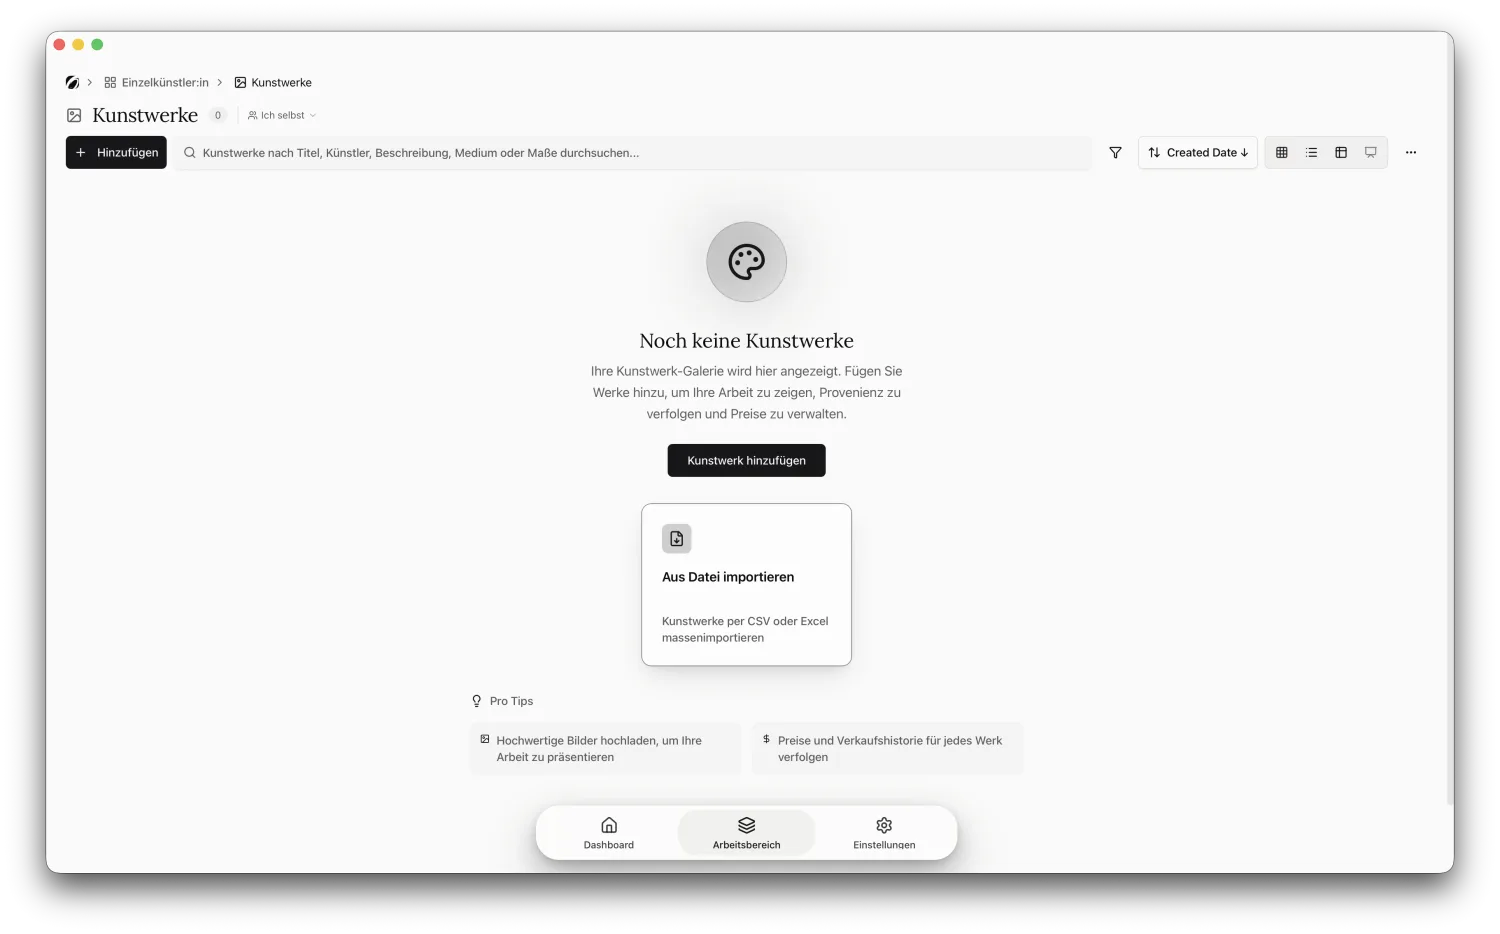
In Opus, go to Artworks. While there’s nothing there yet, you’ll see the Import from file tile right away, otherwise you start the import from Add. You don’t have to create anything first, the assistant creates the works for you.
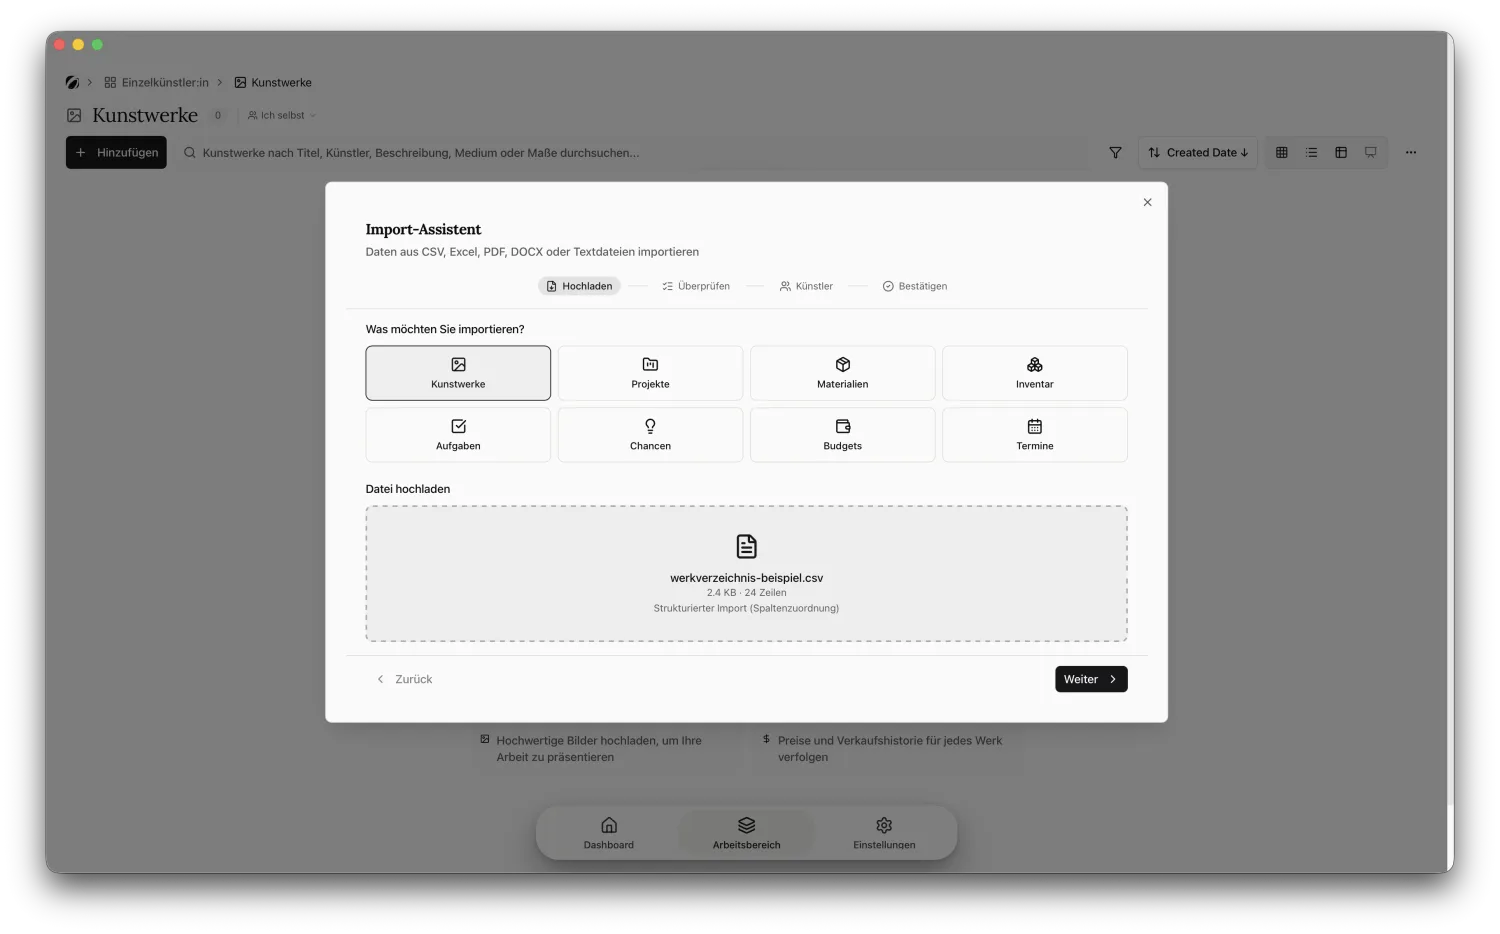
Step 2: Upload the file
In the assistant, choose Artworks at the top as the thing you want to import, then drag your Excel or CSV file into the field. Opus reads the table and tells you how many rows it found. With the sample table that’s 24, recognized as a structured import with column mapping.
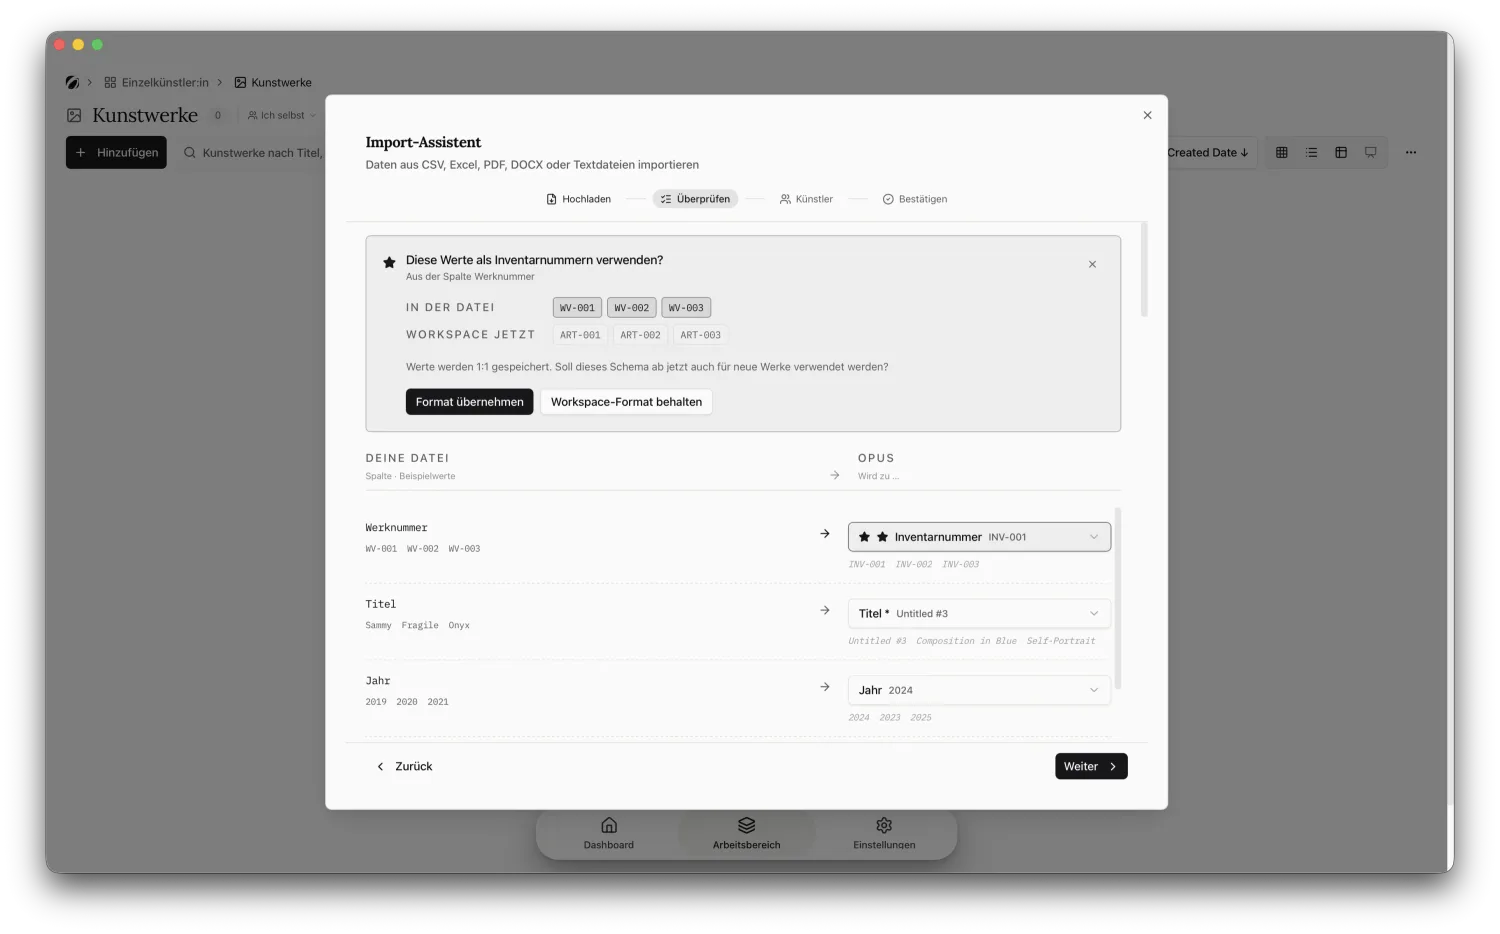
Step 3: Keep your work number
In the Review step, Opus notices the work number first and asks whether it should take your numbers exactly as they are. Say use the format, and WV-001, WV-002, and so on stay intact instead of Opus assigning its own. That’s exactly what you want, because the work number is the one value that should never change.
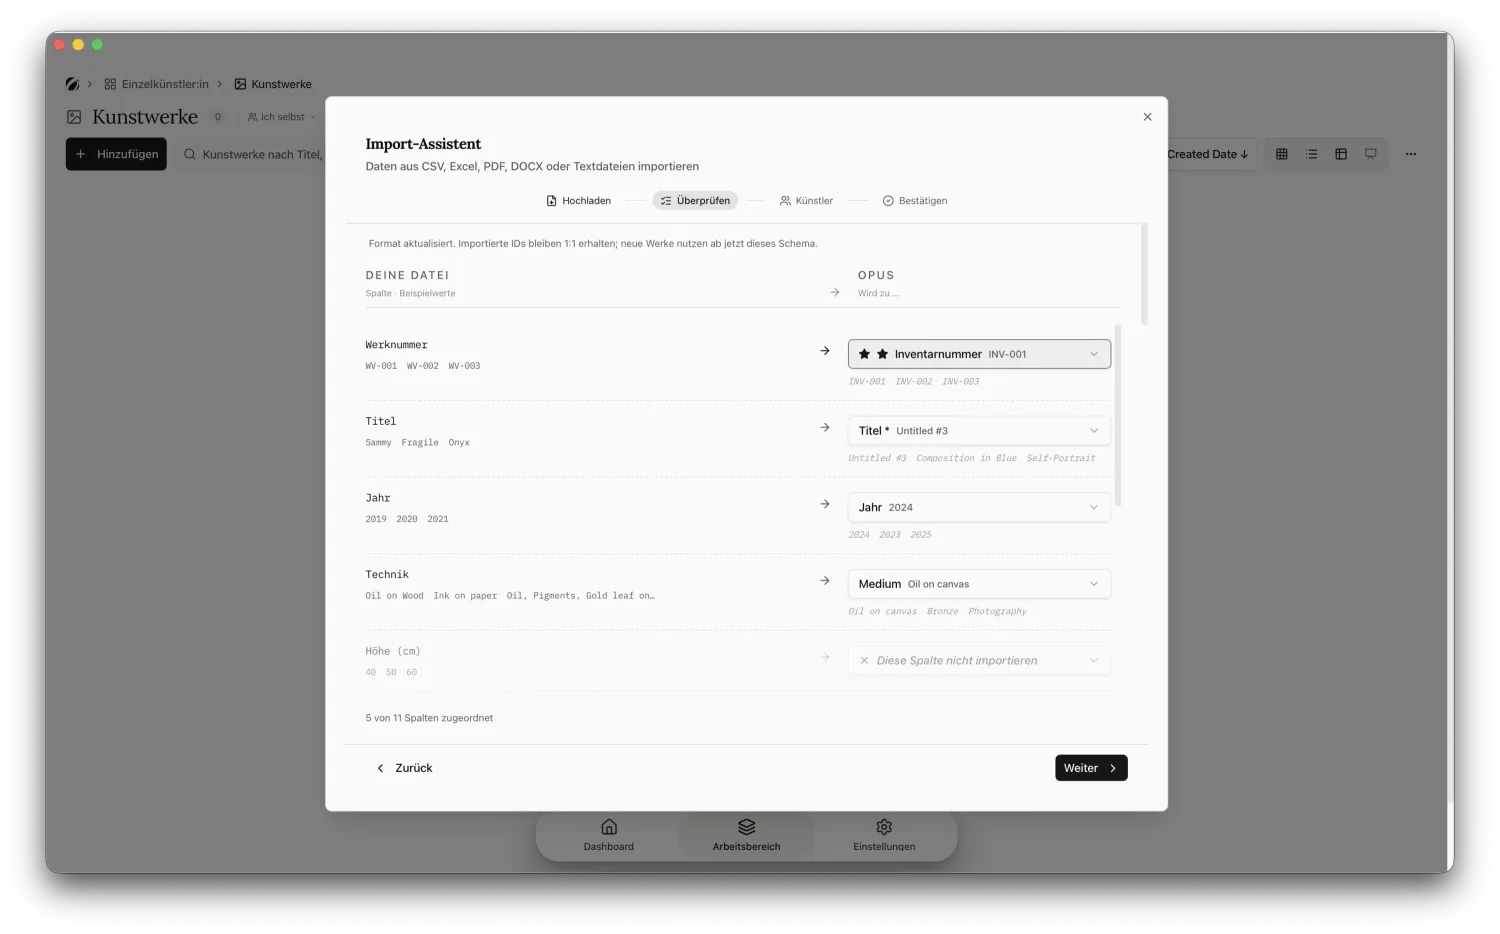
Step 4: Map the columns
This is the only step where you think for a moment. Opus maps the obvious columns on its own, so Title to Title, Year to Year, and Medium to Medium. The rest, like height, width, status, or price, you assign to the right field with the dropdown on the right, or leave out. A running count at the bottom shows how many columns are already mapped.
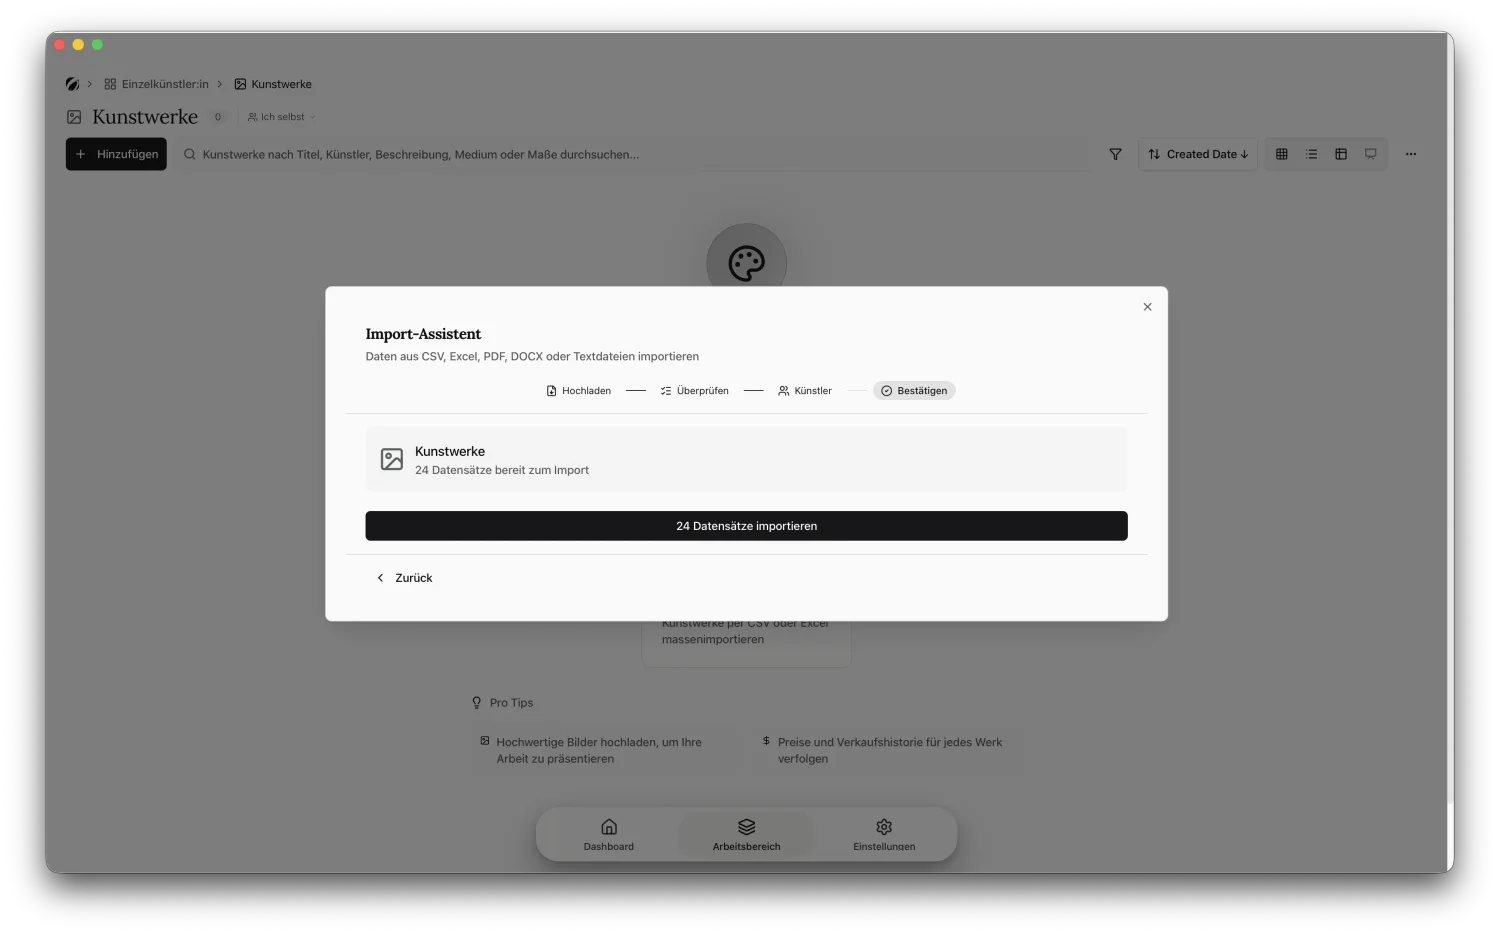
Step 5: Artist and confirm
Before the import, Opus asks about the artist. If your table holds only your own works, link them to yourself and continue. In the final Confirm step you see how many records are ready and trigger the import.
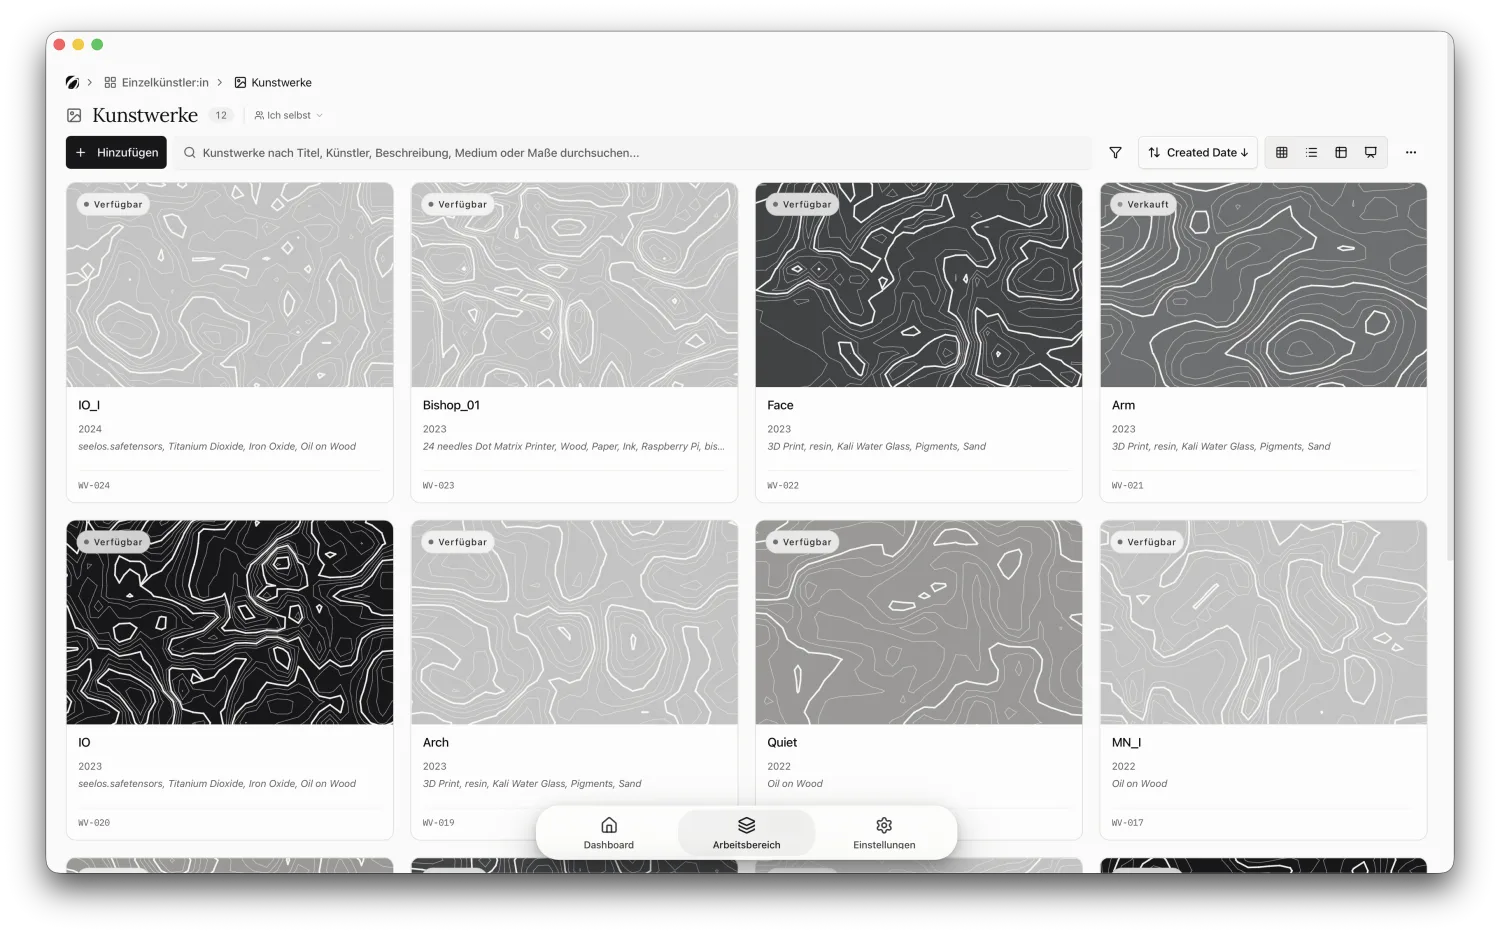
After that your inventory sits in the Artworks view, every piece with its work number and its status.
And the photos?
A table can’t carry images, so the import brings the data but not the photos. That’s exactly what the file-name column is good for: it tells you which image belongs to which work. You open a piece and drag the right photo onto it. That’s the only part you do by hand, and after that it’s done.
When something snags
A few things I’ve seen in my own tables and other people’s:
- Not everything maps automatically. Opus recognizes the obvious columns, for the rest you help out in the mapping step with the dropdown. It takes a few clicks and you only do it once.
- Dimensions in one cell. If everything sits in one column, like “120 x 90”, split it into height and width before exporting. Otherwise the whole string lands in one field.
- Excel turns dimensions into a date. That happens when the cell is formatted as a number. Format the column as text first, then “120 x 90” stays put. How to save a table cleanly as CSV is covered in Microsoft’s help.
- Duplicate work numbers. If two rows share a number, Opus appends a suffix automatically instead of overwriting anything.
- CSV with semicolons. If your file is semicolon-separated, export it as CSV UTF-8, or just upload the
.xlsx. Opus reads both.
Once your table is in shape, the import is done in a few minutes. Try it with your own list and start for free. The rest — keeping status current in Opus’s studio tools, making a loan form, hanging works in a show — you build on a foundation that’s already correct.